 gaetano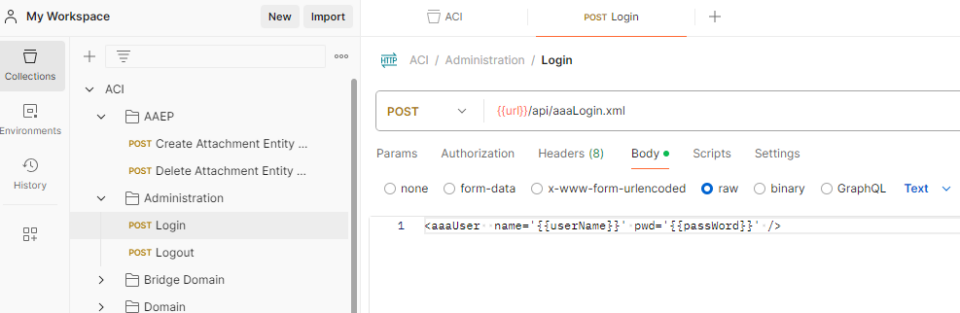
REST API Across Vendors
Modern networking switches from major vendors provide REST APIs for programmatic access:
- Cisco — Nexus OS, Catalyst, IOS-XE, APIC
- Arista — CloudVision and eAPI
- Juniper — NETCONF/YANG via Junos
- Meraki — Cloud-based REST API
APIC REST API Overview
The Application Policy Infrastructure Controller (APIC) exposes a comprehensive REST API for managing ACI fabrics. All configuration and monitoring data is accessible via standard HTTP methods (GET, POST, DELETE, PATCH).
Authentication Mechanisms
APIC supports two primary authentication methods:
- Token-Based (Username/Password) — Simplified, suitable for scripts and tools
- Signature-Based (Certificates) — More secure, recommended for production
Token-Based Login
Obtain a session cookie valid for 10 minutes (can be refreshed). After expiration, reauthenticate.
Login with cURL
You need to use the POST method aaaLogin which logs in a user and opens a session. The message body contains an aaa:User object with name and password attributes in XML format payload:
curl -X POST -k https://APIC_IP_ADDRESS/api/aaaLogin.xml -d '<aaaUser name="USERNAME" pwd="PASSWORD"/>' -c cookie.txtThe APIC controller returns a token stored in cookie.txt file, which lasts 10 minutes. The cookie must be used to run any following REST API.
Example: the REST API that uses XML format payload and creates a new Tenant, a new Application Profile, and a new EPG:
curl -b cookie.txt -X POST -k https://APIC_IP_ADDRESS/api/node/mo/uni.xml -d '<polUni> <fvTenant name="TENANT-NAME" descr="TENANT-NAME-DESC" status=""> <fvAp name="APP-PROF-NAME"> <fvAEPg name="NEW-EPG-NAME" > </fvAEPg> </fvAp> </fvTenant> </polUni>' -c cookie.txtLogin with Postman
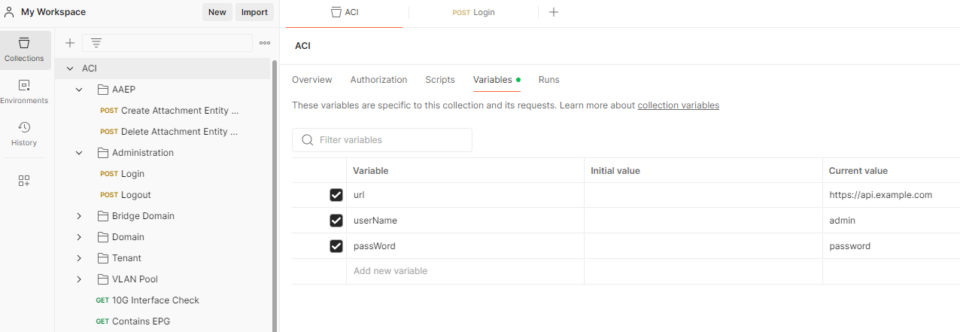
The login with Postman requires these settings:
Method: POST — Body RAW, Type XML:
https://IP_ADDRESS_APIC/api/mo/aaaLogin.xml

<aaaUser name='USERNAME' pwd='PASSWORD'/>
You will receive a token stored in a cookie which Postman will store for you. It will last 10 minutes.
Example: Method: GET — get all NTP providers configured in the fabric:
https://IP_ADDRESS_APIC/api/class/datetimeNtpProvider.xmlIf you prefer JSON format, then change REST URL to:
https://IP_ADDRESS_APIC/api/class/datetimeNtpProvider.jsonLogin and Automation with Python
For automating REST API usage with Python, the Session class can be used, which is available on GitHub:
import requests
from requests.packages.urllib3.exceptions import InsecureRequestWarning
requests.packages.urllib3.disable_warnings(InsecureRequestWarning)

class Session(object):
    def __init__(self, apic_ip, apic_port, user, passwd):
        self.ip = apic_ip
        self.port = apic_port
        self.user = user
        self.passwd = passwd
        self.cookie = ''

    def set_cookie(self, cookie):
        self.cookie = cookie

    def get_cookie(self):
        try:
            auth_url = "https://%s:%s/api/aaaLogin.json" % (self.ip, self.port)
            auth_json = '{"aaaUser": {"attributes": {"name": "%s", "pwd": "%s"}}}'  % (self.user, self.passwd)
            print("Getting cookie from %s" % self.ip)
            session = requests.post(auth_url, data=auth_json, verify=False, timeout=5)
            session_json = session.json()
            token = session_json["imdata"][0]["aaaLogin"]["attributes"]["token"]
            return {'APIC-cookie': token}
        except requests.exceptions.Timeout:
            print("APIC %s timed out " % (self.ip))
        except requests.exceptions.ConnectionError:
            print("Connection error can't log in to APIC %s with user %s" % (self.ip, self.user))

    def apic_json_get(self, url):
        get_json_url = "https://%s:%s/api/class/%s.json" % (self.ip, self.port, url)
        json_get = requests.get(get_json_url, cookies=self.cookie, verify=False)
        print(get_json_url)
        if json_get.status_code != 200:
            print(json_get.text)
        else:
            return json_get.text

    def apic_json_post(self, url, data):
        post_json_url = "https://%s:%s/%s.json" % (self.ip, self.port, url)
        json_post = requests.post(post_json_url, cookies=self.cookie, data=data, verify=False)
        print(post_json_url)
        if json_post.status_code != 200:
            print(json_post.text)
        else:
            return json_post.text
Usage Example:
apic_ip = 'APIC_IP_ADDRESS'
apic_port = '443'  # Default port for APIC for HTTPS
username = 'USERNAME'
password = 'PASSWORD'

# Create a session instance
session = Session(apic_ip, apic_port, username, password)

# Get the cookie
cookie = session.get_cookie()

# Set the cookie in the session
session.set_cookie(cookie)

# URL for the POST request
url = 'api/node/mo/uni/'

# Data for the POST request (JSON format)
data = '''
{
    "polUni": {
        "fvTenant": {
            "attributes": {
                "name": "TENANT-NAME",
                "descr": "TENANT-NAME-DESC",
                "status": ""
            },
            "children": [
                {
                    "fvAp": {
                        "attributes": {
                            "name": "APP-PROF-NAME"
                        },
                        "children": [
                            {
                                "fvAEPg": {
                                    "attributes": {
                                        "name": "NEW-EPG-NAME"
                                    }
                                }
                            }
                        ]
                    }
                }
            ]
        }
    }
}
'''

# Perform the POST request using the session
response = session.apic_json_post(url, data)

print(response)
Authentication and Configuration with Ansible
The Ansible ACI modules provide a user-friendly interface for managing an ACI Fabric environment using Ansible playbooks. In most cases, Ansible modules for network devices do not run on the network devices or controller but talk directly to the APIC's REST interface.
Using the aci_rest Module
Many ACI modules exist in the Ansible distribution, and most common actions can be performed with these existing modules. However, there's always something that may not be possible with off-the-shelf modules. For this purpose, the aci_rest module provides direct access to the APIC REST API and enables you to perform any task not already covered by existing modules.
The aci_rest module accepts native XML and JSON payloads and can accept an inline YAML payload. XML payload requires the path to end with .xml whereas JSON or YAML require the path to end with .json. Modifications require the use of POST or DELETE methods, whereas queries require the GET method.
Password-based authentication is very simple but not the most efficient from ACI's point-of-view as it requires login every time an Ansible task is executed and an open session. Password-based authentication may trigger anti-DoS measures in recent ACI versions resulting in HTTP 503 errors and login failures. To avoid this, use the more efficient Signature-based authentication.
Example: the following Ansible playbook creates a tenant using signature-based authentication and queries it afterward using password authentication:
- name: ACI Configuration
  hosts: localhost
  gather_facts: no
  vars:
    apic_host: 'APIC_IP_ADDRESS'
    apic_username: 'USERNAME'
    apic_password: 'PASSWORD'
    apic_private_key: 'pki/admin.key'
    apic_validate_certs: false

  tasks:
    - name: Add a tenant using inline YAML
      cisco.aci.aci_rest:
        host: '{{ apic_host }}'  # The IP address or hostname of your APIC
        username: '{{ apic_username }}'  # The username for authentication
        private_key: '{{ apic_private_key }}'  # The private key of the user for authentication
        validate_certs: false  # Whether to validate SSL certificates
        path: /api/mo/uni.json  # The API endpoint for creating a tenant
        method: post  # The HTTP method to use
        content:  # The content of the request, in YAML format
          fvTenant:
            attributes:
              name: TENANT-NAME  # The name of the tenant to create
              descr: TENANT-NAME-DESC  # The description of the tenant
      delegate_to: localhost  # Run this task on the local machine

    - name: Get tenants using password authentication
      cisco.aci.aci_rest:
        host: '{{ apic_host }}'  # The IP address or hostname of your APIC
        username: '{{ apic_username }}'  # The username for authentication
        password: '{{ apic_password }}'  # The password for authentication
        method: get  # The HTTP method to use
        path: /api/node/class/fvTenant.json  # The API endpoint for querying tenants
      delegate_to: localhost  # Run this task on the local machine
      register: query_result  # Register the output of the query in a variable
Note: the SSL certificate has nothing to do with the authentication certificate. The SSL certificate is used between APIC and client for secure communication by encrypting transmitted data. The parameter apic_validate_certs set to false avoids client validation of the certificate provided by APIC against a trusted CA.
An authentication certificate is used to verify the client's identity to APIC without using a password. APIC contains a self-signed certificate for a specific local user. The Ansible task uses the user's private key for authentication. APIC challenges the client by asking it to encrypt data using the private key contained in the file pki/admin.key. The client sends the encrypted data to APIC, which can decrypt it with the user's public key in the admin.crt file.
Usage
Save the playbook to a file (e.g., aci_config.yml) and run it using ansible-playbook:
# ansible-playbook aci_config.yml